Selecting the Right Equipment
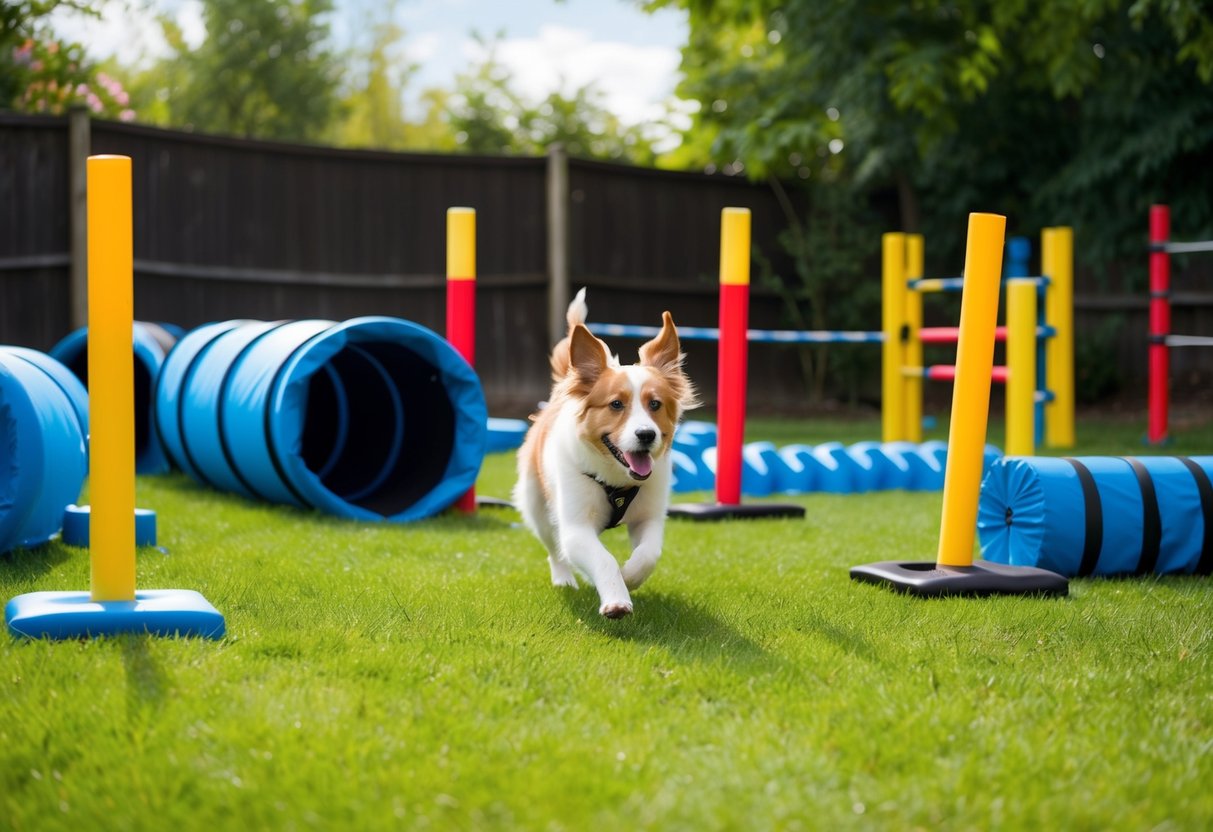
Choosing the right equipment is crucial for an effective agility course. Begin by understanding the dog’s skill level and physical condition. For beginners, simple equipment like tunnels and weave poles is ideal, while more advanced dogs might tackle seesaws and A-frames.
Look for durable materials that can withstand weather conditions if the setup is outdoors. Safety is key, and equipment should be stable, with no sharp edges or pieces that could injure the dog. Adjustability in equipment is helpful to accommodate growing training skills or varying difficulty levels.
Consider incorporating a variety of obstacles to keep the training interesting and challenging. Mixing jumping, balance, and tunnel obstacles can ensure a well-rounded course, allowing the dog to develop speed, agility, and coordination.
Designing the Layout of Your Course
Creating an effective home agility course involves strategically positioning obstacles and tailoring challenges to suit various skill levels. The layout can enhance flow and keep the training engaging for your dog.
Positioning Obstacles for Optimal Flow
The seamless flow of an agility course is crucial for maintaining a dog’s momentum. Consider the shape and size of your available space. Placing obstacles like tunnels and weave poles in a way that prevents sudden stops and sharp turns helps preserve speed.
Staggered placement facilitates smooth transitions between different obstacles. Try arranging jumps in a zigzag pattern to encourage agility and balance.
Lines of sight are essential. Ensure the dog can see the next obstacle easily to sustain focus. Keep the starting line clear and open, allowing the dog to gather speed right from the beginning.
Creating Challenges for Different Skill Levels
It’s important to adjust the complexity of the course to suit different skill levels. Beginners benefit from simple setups with fewer obstacles, focusing on jumps and tunnels that are easy to navigate.
As the dog’s skill improves, gradually introduce more complex elements. Adding weave poles or an A-frame creates opportunities for advanced maneuvers. Consider the height of jumps and the distance between obstacles.
Offer variations in each training session. Mixing up the sequence of obstacles keeps the course interesting and challenges the dog’s ability to adapt. A balance between familiar and new challenges motivates their learning without overwhelming them.
Safety First: Setting Up With Precaution
Creating a safe environment is crucial when setting up a DIY agility course for your dog. It involves careful planning and being mindful of potential hazards from equipment and the surroundings.
Navigating Safety Precautions for Equipment
Using suitable equipment is vital for ensuring safety. Each piece, from jumps to tunnels, needs to be sturdy and well-constructed. Materials should be free of sharp edges, and assembled with precision. Especially when incorporating the dog agility a-frame, securing its stability is paramount to prevent accidents.
Position adjustments should be easy to accommodate different skill levels and sizes. Equipment should be regularly inspected for any wear or damage, replacing parts as necessary. Storing everything properly when not in use can also help minimize risk.